| This article showcases how to add notes to client profiles and program enrollments within the new Clarity UI. For questions regarding note creation in the old UI, please take a look at this article: Adding Program Notes Please note that this user interface is still in beta and is continuously being updated and revised. Please contact HMISsupport@end-homelessness.org if you have any questions or believe something in this article to be outdated. |
This article is a general guideline on the different places in Clarity notes can be left. Ask your agency for specific information on where they would like you to enter notes**
There are two main locations for note creation in Clarity: There is a more universal
- Program-level note tab (found in the program screen)
- Client-level note tab (found in the main navigation on the left side of the screen)
Program Level Notes
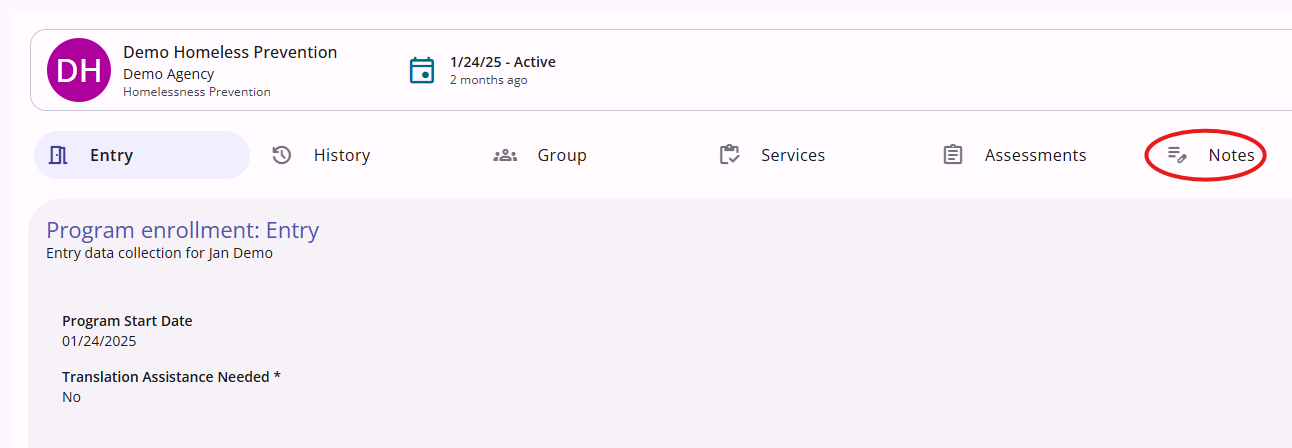
For notes related to a specific program enrollment, navigate to the enrollment page for that program using the Programs tab of the client-level navigation toolbar. Select Notes, denoted here by a slightly different icon of a pencil writing, from the horizontal program-level navigation toolbar.
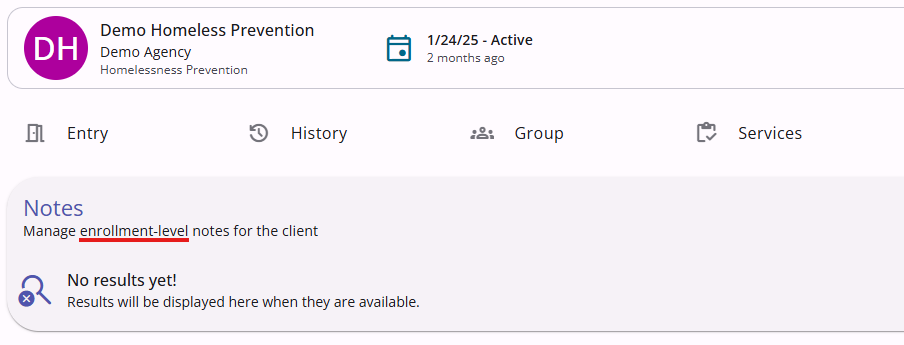
This tab is the same as the client-level navigation notes tab. Click on the + icon in the upper right corner to add a new one. It is important to note that, as seen in the below screenshot, notes left at the client level do not appear in program-level notes lists.
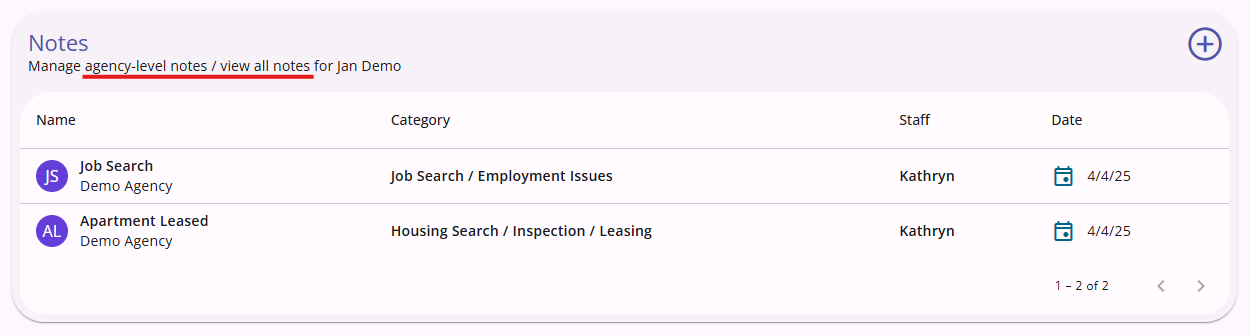
Clicking the + icon will walk you through the same short process requesting the same information as the client-level note overlay. Another important note is that notes left at the program level do appear in the client-level notes list as that one is more general and universal than the more specific program-level.
Client Level Notes
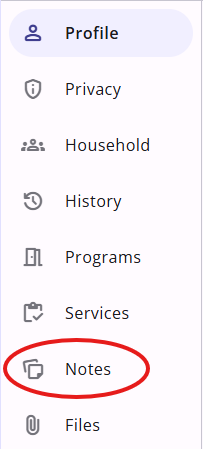
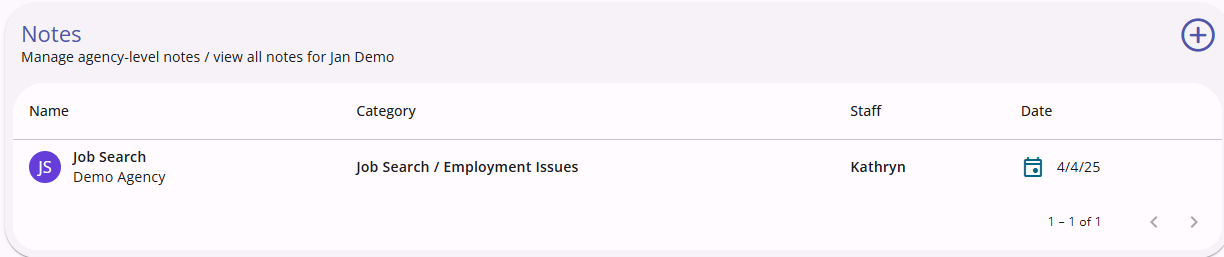
To add a client-level note, first navigate to the desired client's profile page. From there, click on the Notes tab from the vertical client-level navigation bar on the left side of the screen. It is denoted by an icon of a sticky note.
Inside the client-level Notes tab, click on the + icon in the upper right corner of the note list to add a new one.

Adding a new note is a quick, one-step overlay where you will fill out a name for the note, a dropdown to choose the category of information associated with the note (for example selecting "Job Search" for a note about employment), the date, the tracking time if applicable, and the actual body of the note itself.
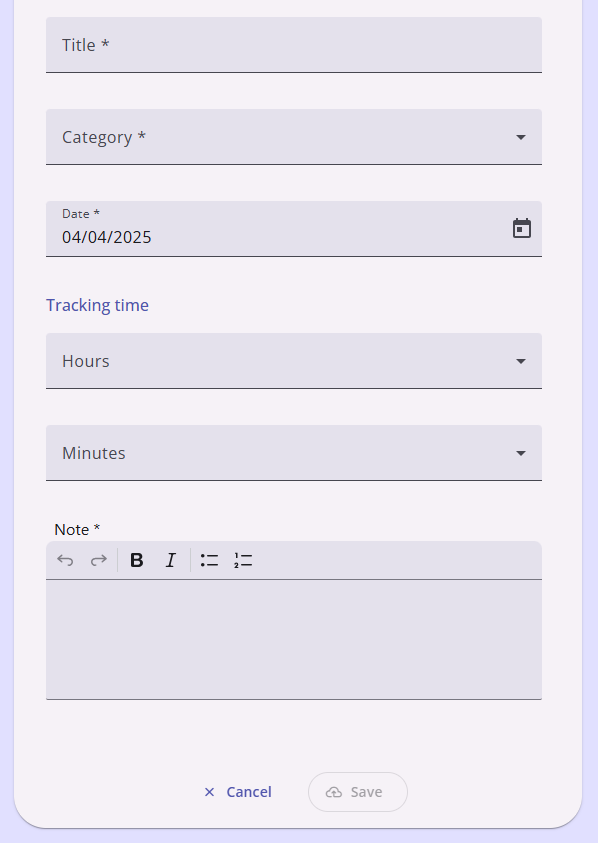
After filling in all the required fields and clicking on the Save button at the bottom of the overlay, the note will be visible in the client's client level note list.
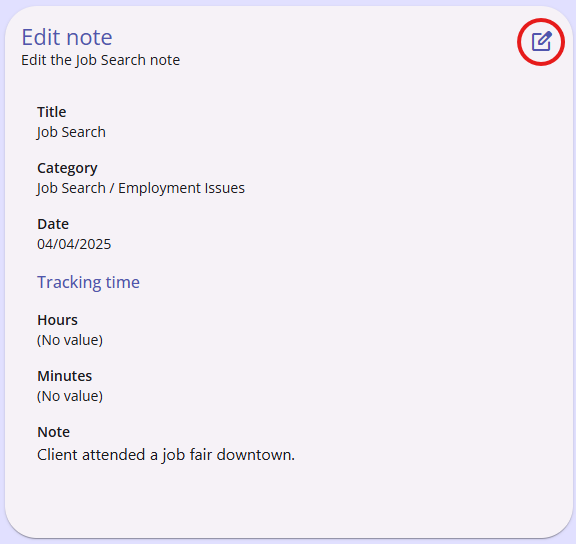
Clicking on the name of the note will open the note overlay once again. Showing all the information provided, as well as allowing for the note to be edited by click on the edit icon in the top right.
Remember to check with your agency to see which way you should add notes.
For more information on notes throughout Clarity, please click this link to read the Bitfocus Clarity Help Center article.
Contact Us
If you need help, or wish to offer suggestions or feedback, please contact the Cincinnati/Hamilton County HMIS support team at HMISsupport@end-homelessness.org or by calling 513-263-2790 9:00a.m. - 3:00p.m. Monday-Friday (excluding holidays).
When contacting HMIS Support about a particular client, please do not send protected personal information (PPI) such as full name, social security number, or any other information used to determine a person's identity through email. Instead, please send the Clarity Unique Identifier found on the client's Clarity Profile page. You can use the messaging system in Clarity if you need to send personally-identifying information.