
Create a New Client Profile
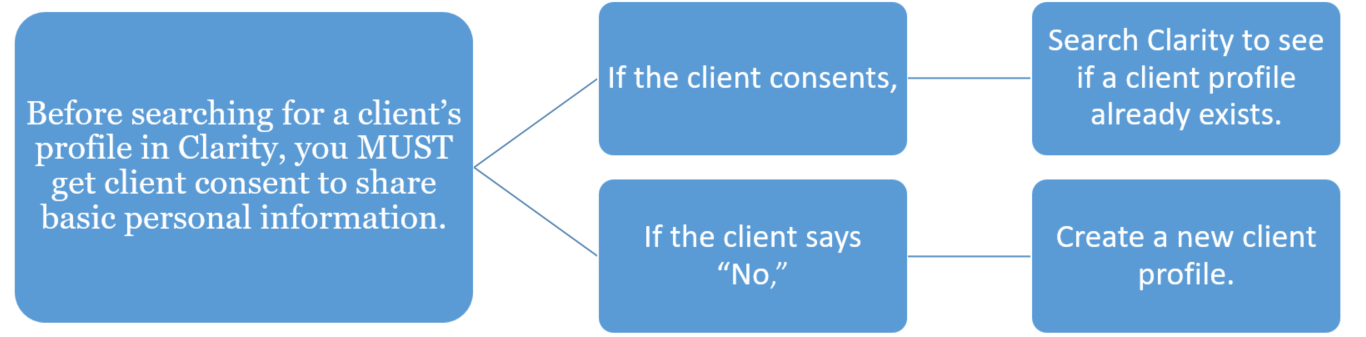
At an initial client encounter - before creating a new client profile:
- Confirm the client agrees to share basic profile information within the HMIS.
- Search for the Client in Clarity to ensure an active client record does not already exist.
- For Clients who agree to share PII within the HMIS, you will need to search the database to ensure there is not an already existing record before creating a new one.
- Search by client’s name (either full or partial), date of birth, last name and last four digits of the client’s Social Security number (for example, Demo 0000 brings up every client with that particular combination of name and digits). Note: if searching with last 4 digits of social, enter a space between the name and digits.
- If a there is an existing record, confirm that the profile data is up-to-date/correct with the client
- If the client is not already in the system, click “ADD CLIENT” in the top right corner of the "search for a client" box.
- For Clients who agree to share PII within the HMIS, you will need to search the database to ensure there is not an already existing record before creating a new one.
To create a new client profile, click on the plus "+" icon in the top right of the client search screen. The icon is circled in red in the below screenshot:

Note: Clarity allows for multiple profiles for the same client in the event of ROI refusal, please make sure to attain consent to search for your client in the database before creating a new profile to minimize duplicate records.
Clicking on this icon will open the overlay that walks through the process of creating a new client profile. There are only two major steps: (1) filling out the client's general demographic, personal identifying information (PII), and contact information and (2) documenting their consent to a release of information (ROI).
Note: Depending on your agency, there may be other agency or program specific ROIs the client must understand and consent documented in Clarity. For a more detailed explanation, click this link to see our article about the different types of ROIs.
The first step is filling in the Client Profile Form.
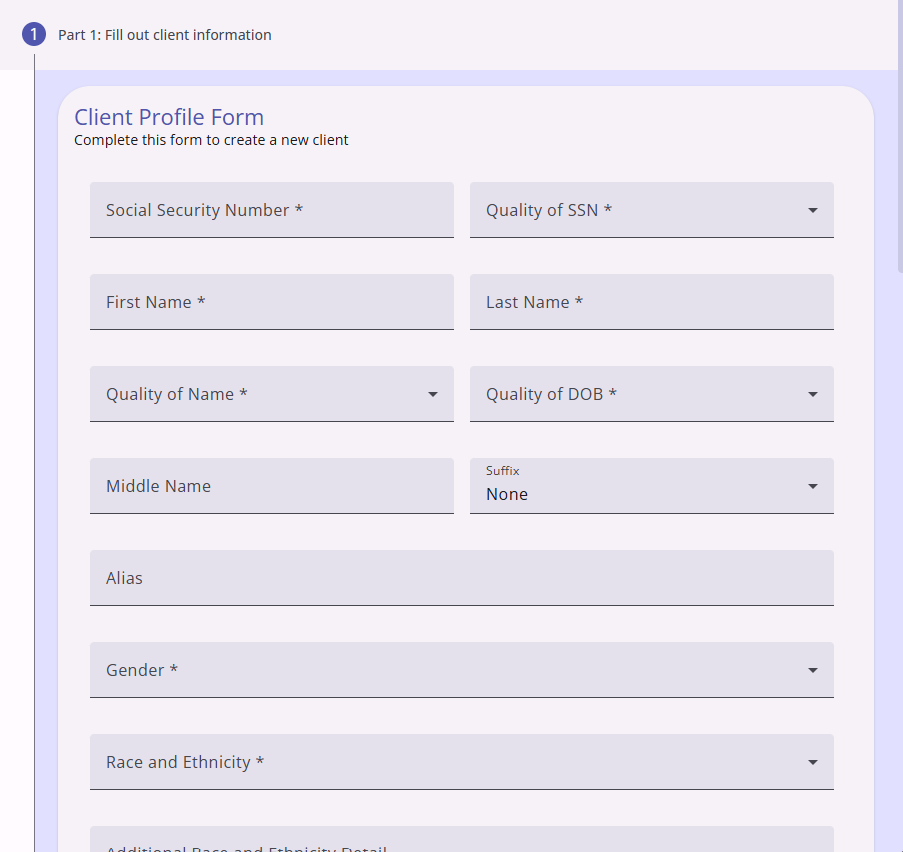
Here you will be required to fill out the client's SSN, their full name, date of birth, gender, and race and ethnicity; as well as the "quality" of certain data. For example, if the client only knows the last 4 digits of their SSN, you may report the data as "partial" in the quality dropdown. Another example would be if the client requests you take down their street name as opposed to their full legal name, that can also be reported in the name quality dropdown. There are options in the quality dropdowns for "client doesn't know," "data not collected," and "client prefers not to answer." However, collecting accurate and complete information is necessary to ensure the quality of data reports run within the Clarity system.
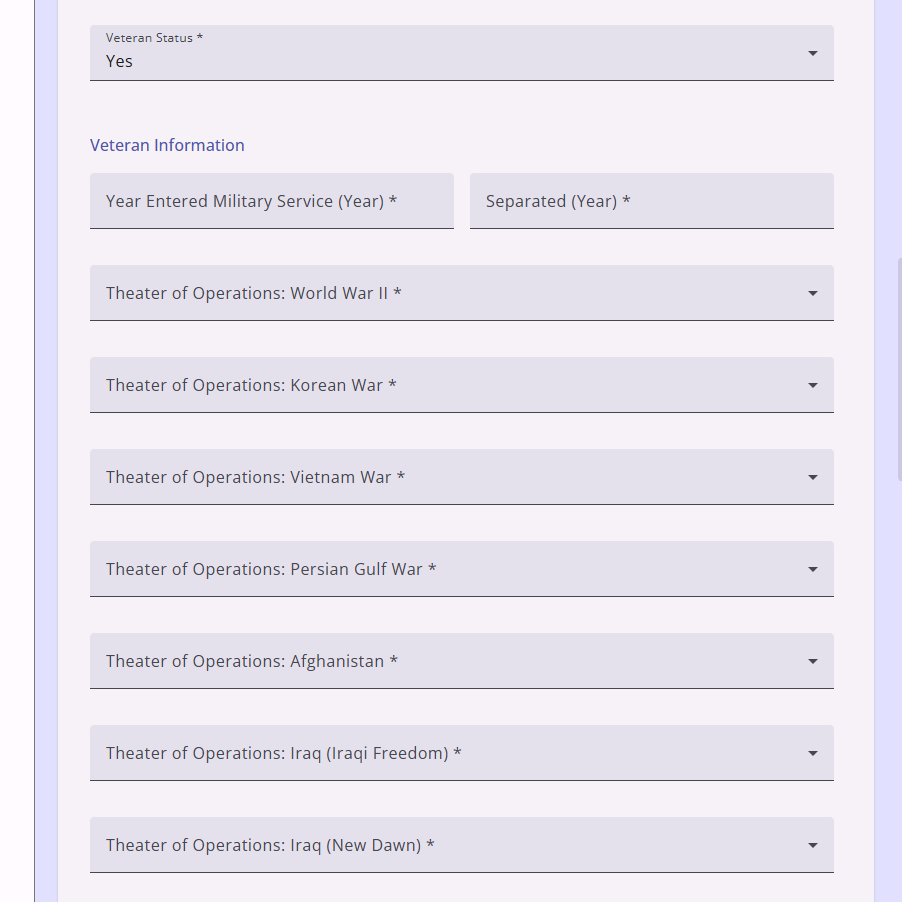
Further down, the page will also require you to denote the veteran status of this client if they are over the age of 18. If you are unsure of the client's age, use your best estimate to ensure they are logged correctly as either a minor or adult. Selecting "yes" to this question will populate the page with more data fields regarding their time in service: Their branch, years served, operations involved in, and discharge status.
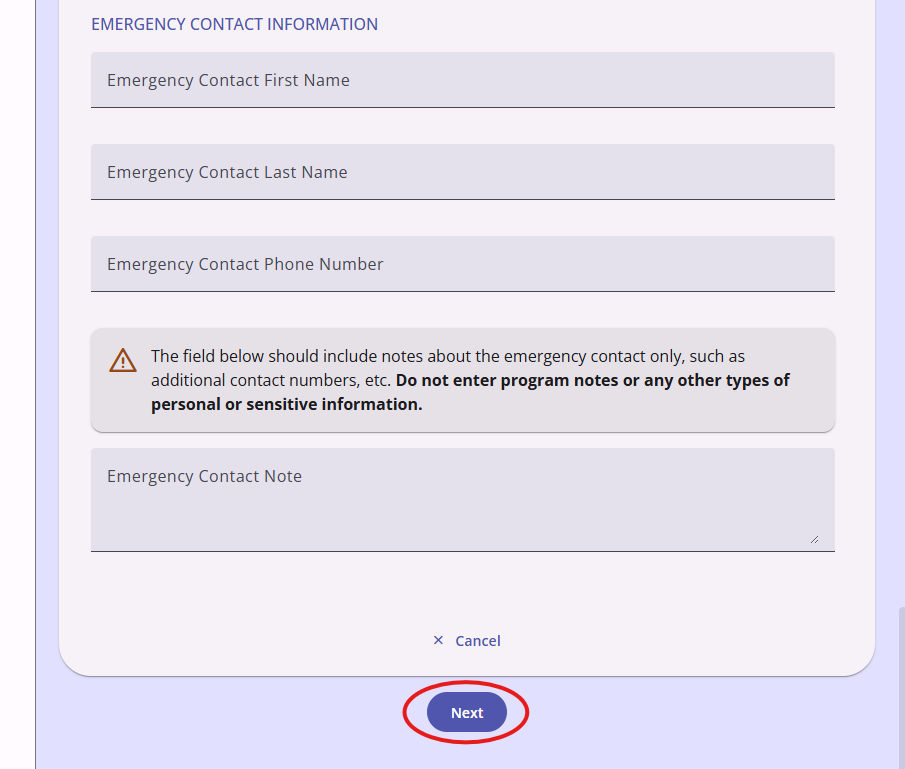
The last section of this page is to fill in both the contact information of the client themselves, as well as the contact information for the client's emergency contact. These fields, unlike the previous ones, are not required and the profile creation can continue without them.
After filling in all the relevant information, click on the blue Next button at the of the page to go on to the next step.
The second step of the process is documenting whether or not the client consents to the ROI. An ROI is a document with the client to share their information to understand and improve services and housing in our communities. Clients MUST understand the HMIS Privacy Notice and Client Consent Form on each initial agency intake.
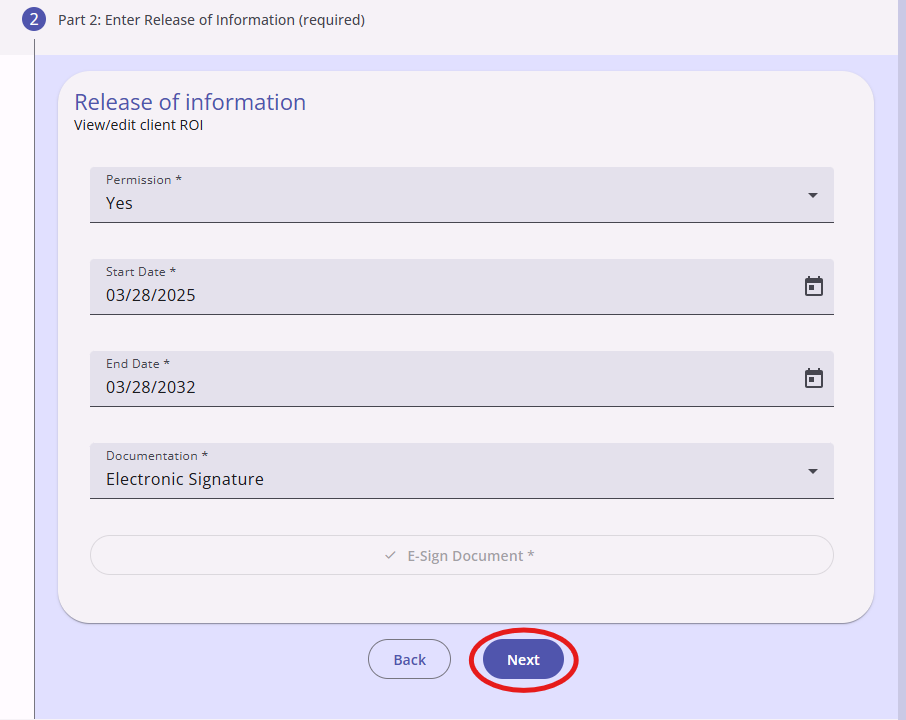
If a client consents to the ROI, the start and end date will automatically populte with the current date and 7 years from the current date respectively. ROIs must be re-consented to every 7 years - or at each additional initial agency interaction. The documentation of consent dropdown options are:
- Electronic Signature -- A small window will open that the client can sign that they were given proper explanation of the HMIS Privacy Notice and Client Consent Form.
- Attached PDF -- The system will allow you to attach said PDF.
- Signed Paper Document -- Make sure to keep said document somewhere readily available on file.
- Verbal Consent
- Household -- Select this option if the client in question is a minor and their guardian signed the ROI on their behalf.
Verbal consent is typically considered to be the weakest and most unreliable form of ROI consent. Please attempt to gain a more reliable form of consent, when possible.
If a client understands the HMIS Privacy Notice and Participant Consent Form and does not consent to an ROI, simply select "no" from the permission dropdown. Update the client's privacy settings updated from the Privacy tab on their profile. Data will still be entered into Clarity - but the client's data will not be accessible to users at other agencies and their data will only be used in aggregate uses.
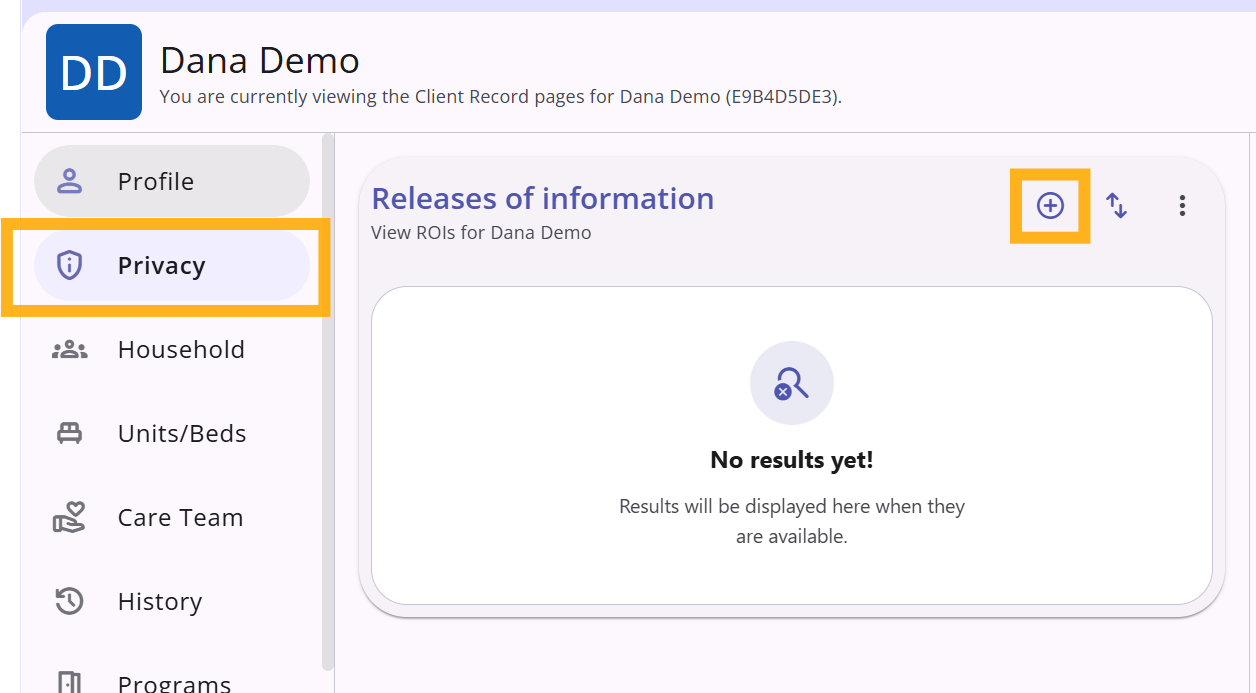
Once the necessary information has been filled out, click on the blue Next button at the bottom of the page to go on to the final screen of the overlay. The final screen is simply a confirmation that the client intake profile creation process is finished and that your task is completed. Click the Complete button to close the overlay.
For more information on client profile creation, check out this article from Bitfocus: How Do I Create a New Client Record? (New Clarity Interface)
For more information on client ROI, check out this article from Bitfocus: Release of Information (ROI) Overview (New Clarity Interface)
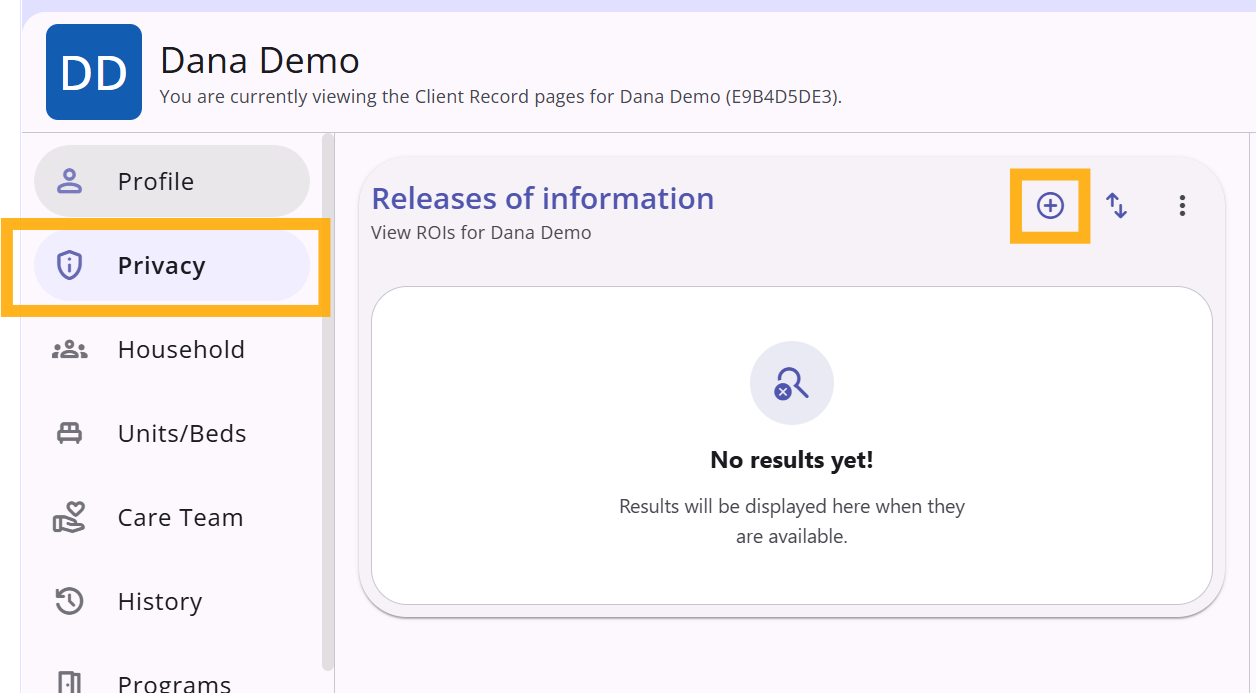
If the client did not consent to share their data, users must also update the privacy settings to set the profile to "private." Go to the client-level "Privacy" tab. Select the Plus "+" icon.
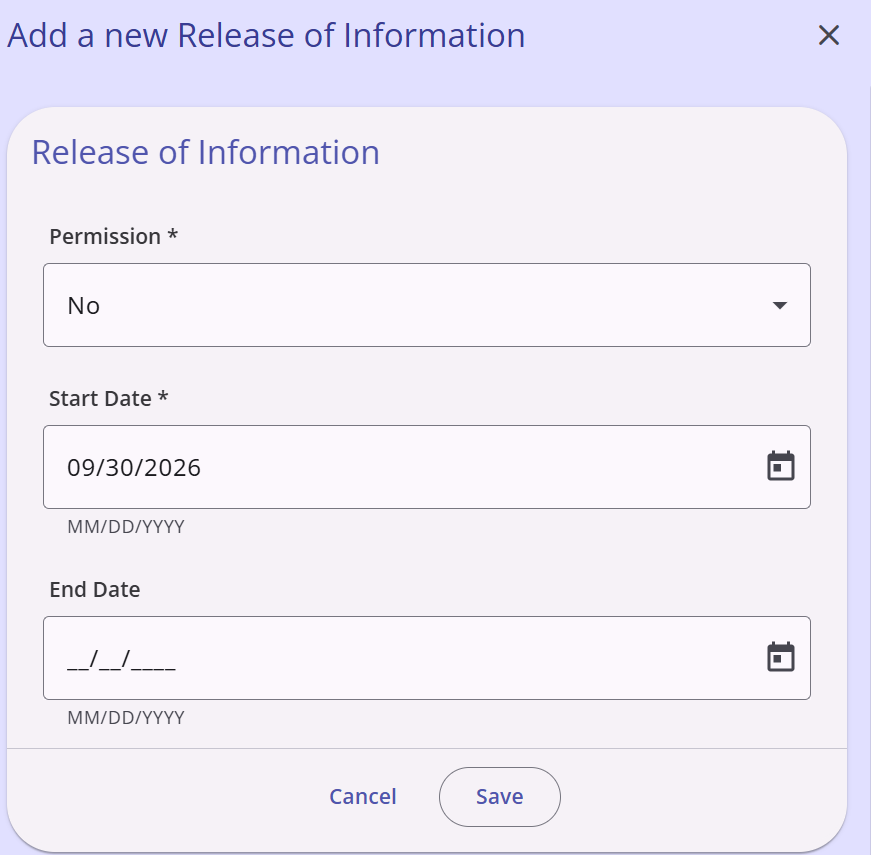
In the "Add a new Release of Information," change the Permission to "No." Select "Save."
Contact Us
If you need help, or wish to offer suggestions or feedback, please contact the Cincinnati/Hamilton County HMIS support team at HMISsupport@end-homelessness.org or by calling 513-263-2790 9:00a.m. - 3:00p.m. Monday-Friday (excluding holidays).
When contacting HMIS Support about a particular client, please do not send protected personal information (PPI) such as full name, social security number, or any other information used to determine a person's identity through email. Instead, please send the Clarity Unique Identifier found on the client's Clarity Profile page. You can use the messaging system in Clarity if you need to send personally-identifying information.