| Please note that this user interface is still in beta and is continuously being updated and revised. Please contact HMISsupport@end-homelessness.org if you have any questions or believe something in this article to be outdated. |
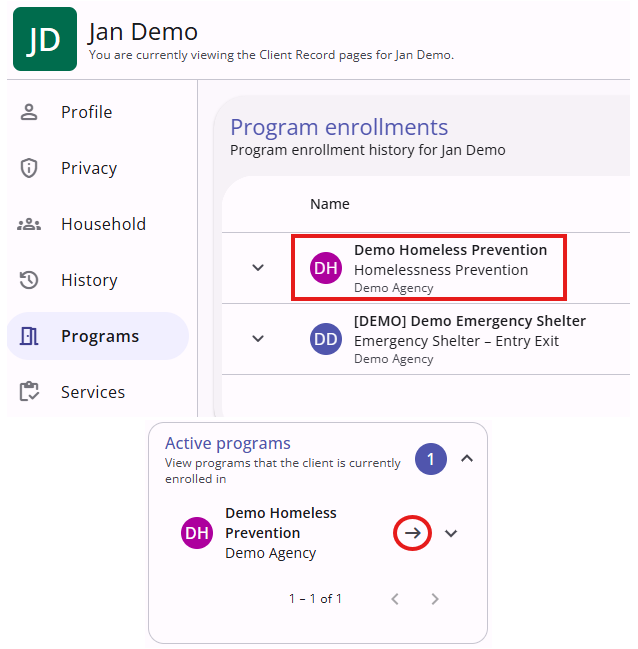
To add a service to a client in the new UI, you will first need to navigate into the program that will be providing the service. From the profile screen of the client you are adding a service to, you can reach the active program enrollment by either going to the Programs tab of the client level navigation and selecting the correct program or by clicking on the arrow on the right side of the screen under the "Active programs" box to be taken directly to the enrollment.
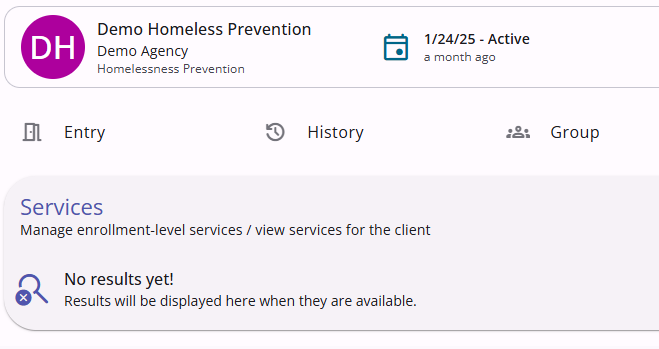
Once inside the active program enrollment, select the Services tab from the program level navigation toolbar denoted by a clipboard icon.

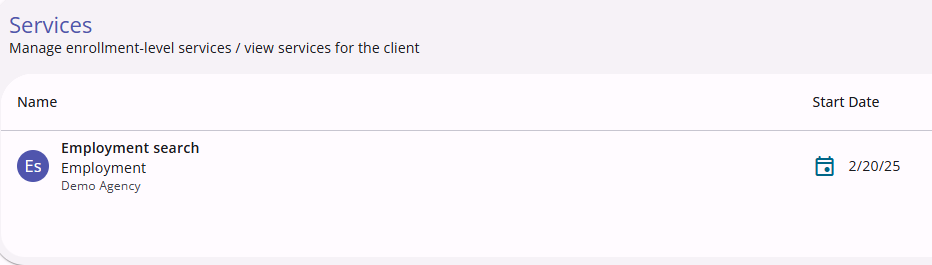
Here there will be a list of all services provided by the program previously.
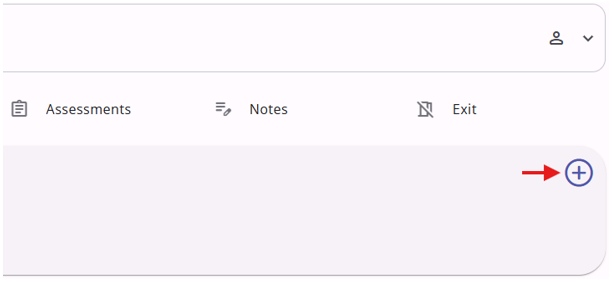
To add a new service, click on the + icon over in the top right corner of the service history.
The actual services available to choose from will vary depending on the program. Clicking on the + icon will bring up an overlay walking through the process of adding a service from the ones available.
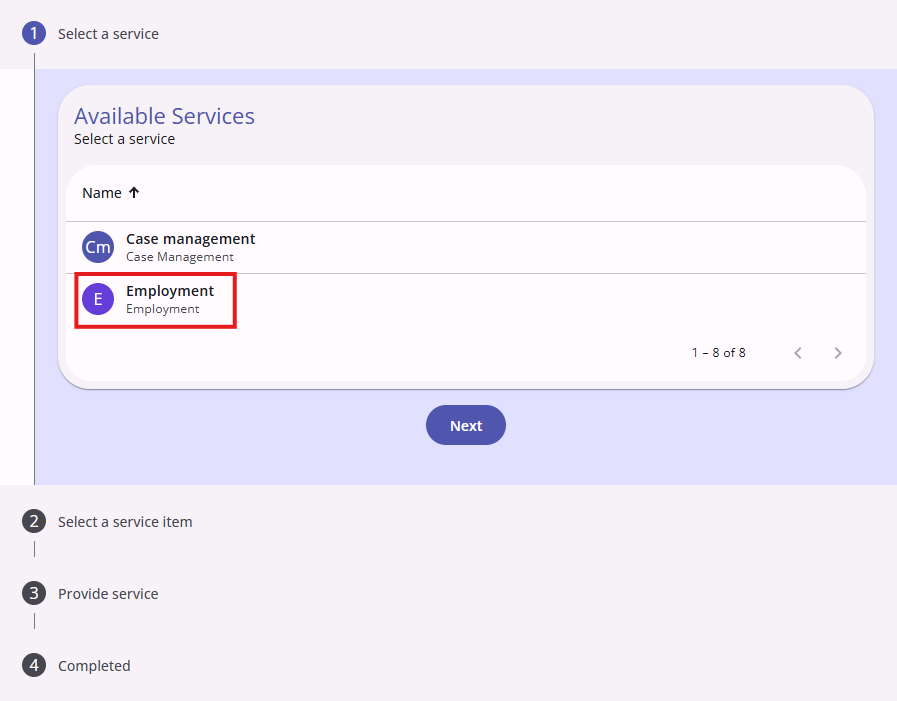
The first step is to choose which category of services the one you are providing falls under. The Demo Homeless Prevention program provides case management related and employment related services. For this example, we will add an employment service. Click on the correct category and select the Next button at the bottom to move on to the next step.
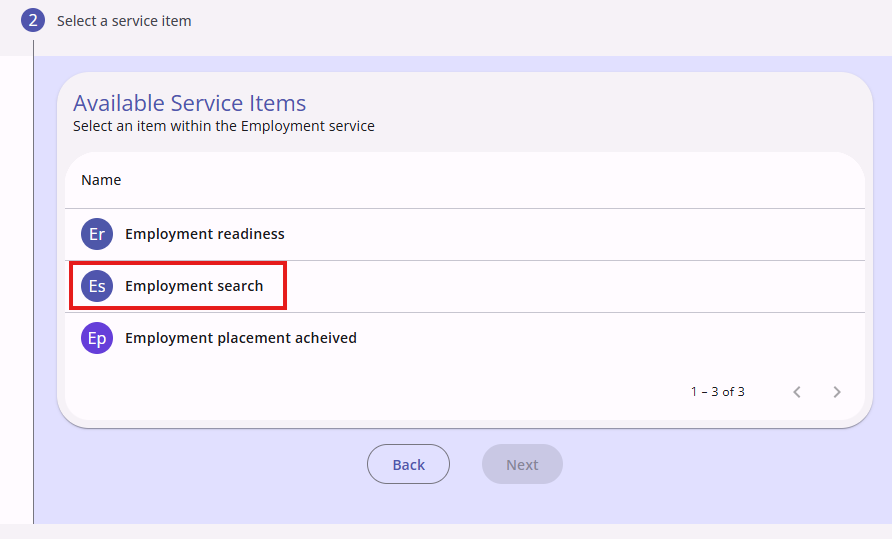
After choosing a category, the next step is to select which specific service offered within that category is being provided. In this example, we will be providing an employment search service. Select the correct service and click on the Next button.
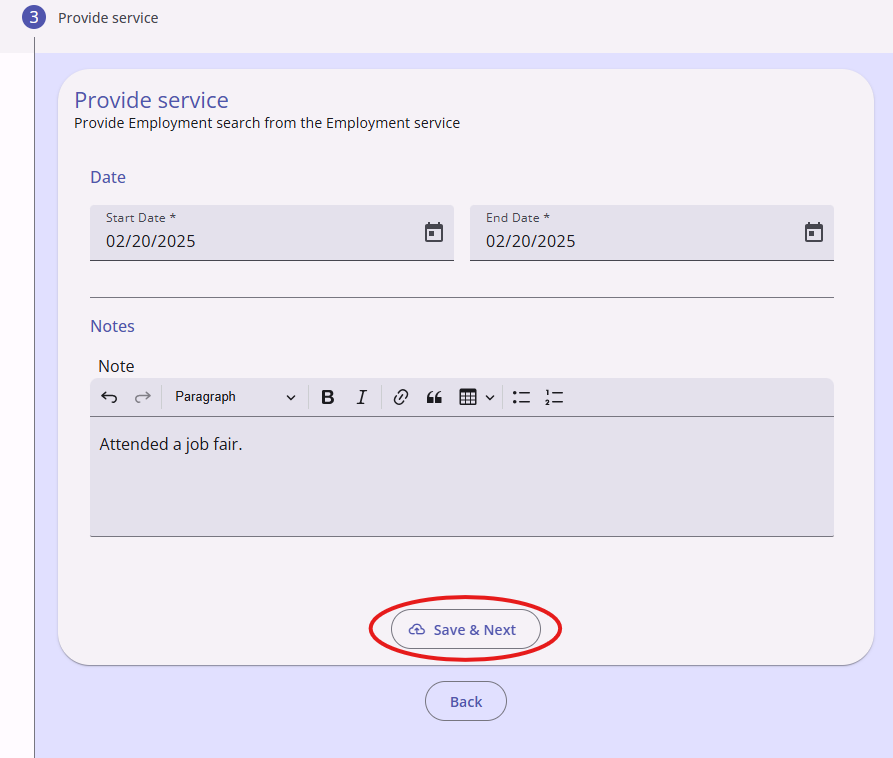
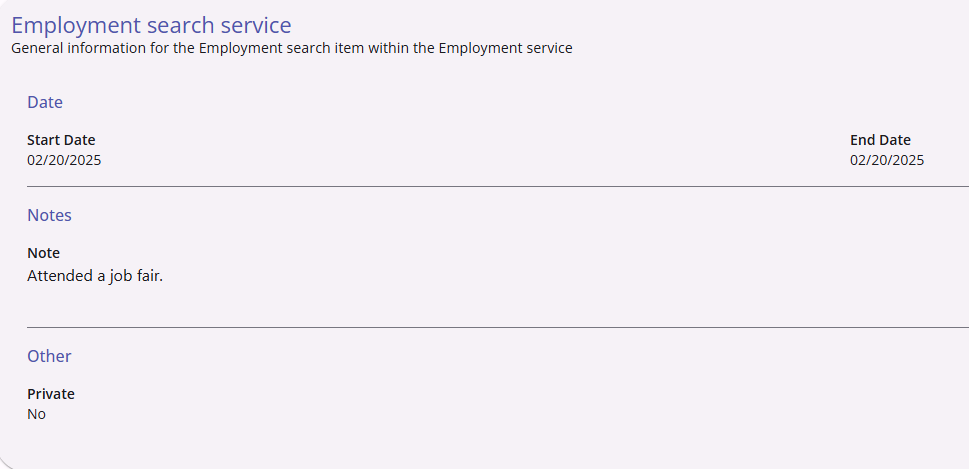
The third step is to fill out the start and end date of the service and include a brief description of what happened. The start and end date of a service can be the same date. Click on Save & Next after filling out the fields to add the service.
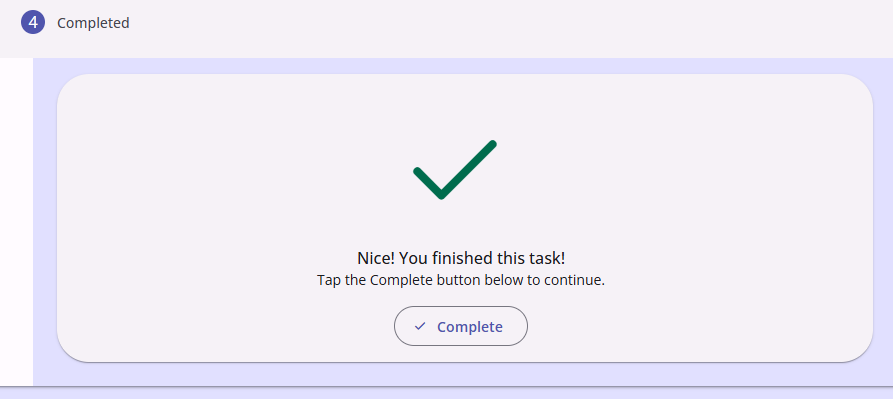
The fourth screen is a confirmation that the task of adding a service has been finished. Click the Complete button to be taken back the Services tab, now with the newly added service visible in the history.
Click on the specific service will open additional information about the service. This is how you will see the note for a service.
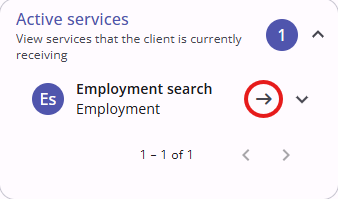
Programs that have not passed their end date yet will also be visible from the "Active services" box on the client's main profile screen. Clicking on the arrow beside the service will allow you to jump straight to the service information, as it would a program in the "Active programs" box.
For more information on services in the new UI, please check out this article from Bitfocus: Recording and Editing Service Items in the Client Record (New Clarity Interface)
Contact Us
If you need help, or wish to offer suggestions or feedback, please contact the Cincinnati/Hamilton County HMIS support team at HMISsupport@end-homelessness.org or by calling 513-263-2790 9:00a.m. - 3:00p.m. Monday-Friday (excluding holidays).
When contacting HMIS Support about a particular client, please do not send protected personal information (PPI) such as full name, social security number, or any other information used to determine a person's identity through email. Instead, please send the Clarity Unique Identifier found on the client's Clarity Profile page. You can use the messaging system in Clarity if you need to send personally-identifying information.